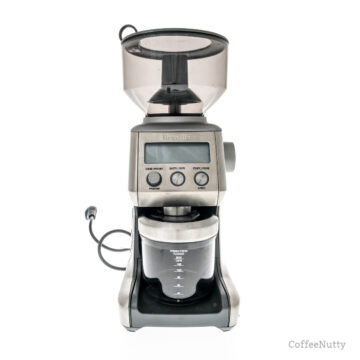
So, you’ve gone to grind some coffee beans only to be surprised by a puff of smoke. We know how frustrating that must be. Nothing good ever comes from a smoking coffee grinder. Once you see that puff of smoke, it’s time to act. But where do you start?
This article will answer that question and more. Keep on reading for step-by-step instructions for how to repair a smoking coffee grinder.

Gather the Supplies You Need
Before diagnosing the problem that is causing your coffee grinder to smoke, you need to have the right materials on hand to open up your coffee grinder. We will quickly go over those materials below.
To disassemble your grinder and find out why it’s smoking, you’ll need the following supplies:
- Pliers to grip small parts
- Screwdrivers to open up the machine
- Canned air or a brush for cleaning.
- Thick towel
Diagnose the Problem
Before you can begin repairing anything, you need to find out what the source of the problem is. Many things could go wrong on the inside of your coffee grinder. The below sections will go over several of the common causes of a smoking coffee grinder.
Check the Armature
The armature is the part of the coffee grinder that supplies power to the unit. Whenever your coffee grinder is smoking, it is wise to check the armature and see what kind of condition it is in.
If the armature appears dusty and dirty or is covered by any debris, this can cause a short in the machine. This could be the cause behind the smoke that you see.
Take Inventory of the Carbon Brushes
The carbon brushes are important to the successful operation of your coffee grinder. This is because these brushes help to power the machine’s motor. Whenever there is an issue with the carbon brushes, the coffee grinder could start to smoke.
What you should look for when examining the carbon brushes is whether they appear to be worn down. If carbon brushes have been worn down, they will produce sparks on the interior of the machine. This eventually causes the machine to smoke.
Make Sure the Fields are Not Corroded
Taking a look at the fields in the interior of the machine can help you to determine whether they are the cause of the smoke. The field is a fancy magnet that is necessary for your coffee grinder to work properly.
If, upon visual inspection of the fields, you notice that it is covered in dirt or is otherwise corroded, you will need to repair this.
The Power Switch Could Be to Blame
Something as simple as the power switch can cause your coffee grinder to start smoking. The switch will need to be closely inspected for signs of melting and corrosion.
Many times, the power switch is the cause of smoking. There is no way to avoid power switch degradation, as power switches are known to degrade over time.
The Fans Could be Out
Coffee grinder fans help to keep the internal components of the coffee grinder from overheating. If the fans are not working properly, this will allow the components of the machine to overheat.
If the coffee grinder is used while the fans are not working, it won’t take long for the coffee grinder to get extremely hot and begin to smoke.
The Gears Could Be Dried Out
If the internal gears of your coffee grinder are not adequately lubricated, they will begin to produce heat. Dried-out gears are another one of the top causes of a smoking coffee grinder.

Repair your Coffee Grinder
To begin repairing your coffee grinder, first, you will need to expose its interior and see what is going on.
Disassemble the Unit
The first step of repairing a coffee grinder is to disassemble it. To open the average coffee grinder, follow the below steps:
- Unplug the coffee grinder. If you open the machine while it is still plugged in, you could suffer serious injury.
- Access the inside of the unit. In most models, all it takes to open up a coffee grinder is to unscrew the screws at the bottom of the unit (or under the unit).
- Take out the blade. To eliminate the risk of cutting yourself while repairing your unit, you should remove the blade from the grinder. Generally, the best way to do this is to hold the blade steady while turning the rest of the machine counterclockwise.
Note: If you have a burr grinder, this gets more complicated. You will have two sets of blades to remove. Consulting the manual of your exact make and model is very important.
- Remove the motor. This step is important for troubleshooting many of the above issues.
- Take out the remaining components. Be very careful with this step. Don’t use unreasonable force to remove any of the parts. If it is supposed to be removed, it will not take a ton of elbow grease to do it.
Pro tip: As you remove components, take photos with your phone and make notes of where each part goes.
Don’t Make It Harder Than It Has to Be
There’s no need to remove any components that were not mentioned in the previous section. These are the component you’ll need to inspect to address a smoking issue:
- Armature
- Carbon brushes
- Fields
- Power switch
- Gears
Inspect and Clean the Components
The next step is to inspect all of the components that you removed from the grinder.
Make sure that each of the components is free of dirt and debris. The best way to do this is to spray them with canned air or wipe them down with a microfiber cloth. The cloth is better suited to removing heavier gunk.
Replace Damaged Parts
If any of the parts are physically damaged, they will need to be replaced. To get replacement parts, you should reach out to the manufacturer for information. Some manufacturers will send you replacement parts for a discounted fee. Alternatively, you can go to a hardware store or purchase the parts online.
Troubleshoot Coffee Grinder Fan Issue
Removing the fans will not give you any information about whether they work or not. Instead, you will need to enlist the help of a professional to troubleshoot a fan issue. They will be able to tell whether the fan is working properly.
Reassemble the Unit
Once the components are cleaned or replaced, you are ready to reassemble the unit. To do that, simply resecure the parts the way that they were before. This is why taking notes on the locations of components when disassembling was so important.
If you can’t figure out how to reassemble the unit, you can search online for the brand and model of your coffee grinder to find a diagram on how to assemble it. Coffee grinders are not all created equal.
Consult a Professional
Repairing a coffee grinder that is smoking is no easy task. Many problems can cause this issue, and the inside of a coffee grinder is not easy to make sense of in most cases. Also, there are parts of a coffee grinder that may be difficult to remove or place back in their proper places.
So, unless you are into techy-type things and have the patience to figure these things out, it is recommended not to do your coffee grinder repair yourself.
Instead, you can hire a professional to do the repair or ask for help from the manufacturer. If the manufacturer believes that the coffee grinder needs professional attention, they may be able to point you toward a qualified technician. But if you are keen on finding one yourself, you may be able to locate one by doing a simple internet search.
Final Thoughts
Repairing a smoking coffee grinder is quite the undertaking. It requires gathering supplies, disassembling the unit, and inspecting the parts before reassembling the unit. If you are up for the job, you can fix your coffee grinder yourself- otherwise, it is advised to hire a professional.
RELATED POSTS:


